


Beef cheek ragu, slowly cooked in the oven in a rich and bold red wine sauce, it is perfect for stirring through pasta or filling a sandwich.
This is a rare recipe of mine that serves more than two, but the ragu can be refrigerated for later, and it freezes perfectly.

Braised Ox Cheek Ragu
My website is littered with ragu recipes; I have everything from pork ragu to wild boar ragu and lamb ragu to venison ragu. I even have a haggis pasta bolognese style ragu!
When it comes to beef ragu, then ox cheek is my favourite cut of meat to use!
It is a very lean cut of meat with a very tight grain. As a result of the amount of work it does as a muscle, it needs long, slow cooking.
I have a beer-braised beef cheek recipe, but here in this ragu, I slowly cook the beef in the oven just as I do with my Spanish rabo de toro recipe.
It braises gently with a whole bottle of red wine, some beef stock and anchovies. I do not cook it to the stage of "pulled beef" because I like a little more texture.
Due to its increasing popularity, the costs have risen of late, and it is a little more expensive than chuck or stewing beef.
However, you get so much more flavour from beef cheek than you do from any other cut of stewing beef, in my opinion.

Frequently Asked Questions
Can this be made in advance?
Yes, in fact, it improves after a couple of days in the fridge. You can reheat it in a saucepan over a medium heat.
Can I freeze this?
Yes, it will freeze perfectly and be fine in the freezer for up to 3 months. I always defrost it before reheating.
Do I really have to use the anchovies?
No, you can omit them, although I would urge you to give them a chance!
They do not have a pronounced anchovy flavour in this dish. Instead, they provide a subtle roundness and umami richness to the sauce.
What wine should I use?
As a general rule, I say if you like drinking a wine, then it is fine to cook with it. This beef cheek ragu is pretty versatile and will work well with most reds.
I usually cook it with a bold and fruity red, something like a merlot or pinot noir.
Can I make this in advance?
Yes, this will sit in the fridge for a couple of days, and it will be fine in the freezer for up to 3 months.


Serving Suggestions
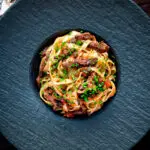
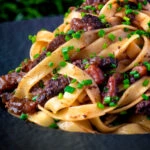
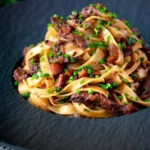
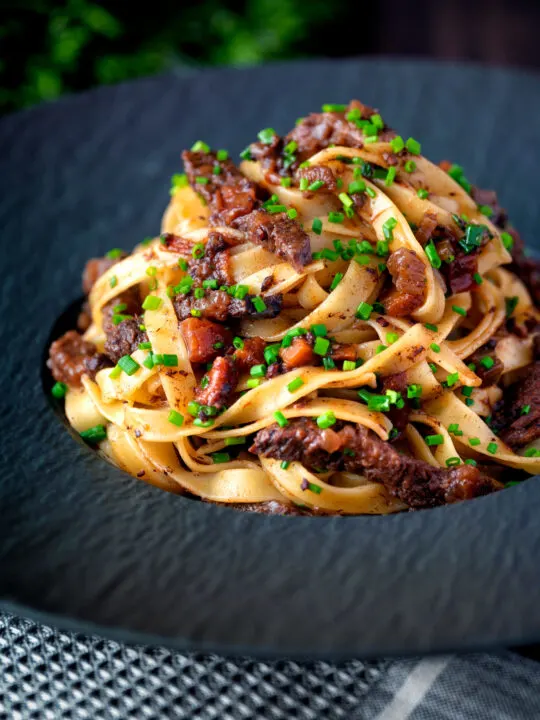
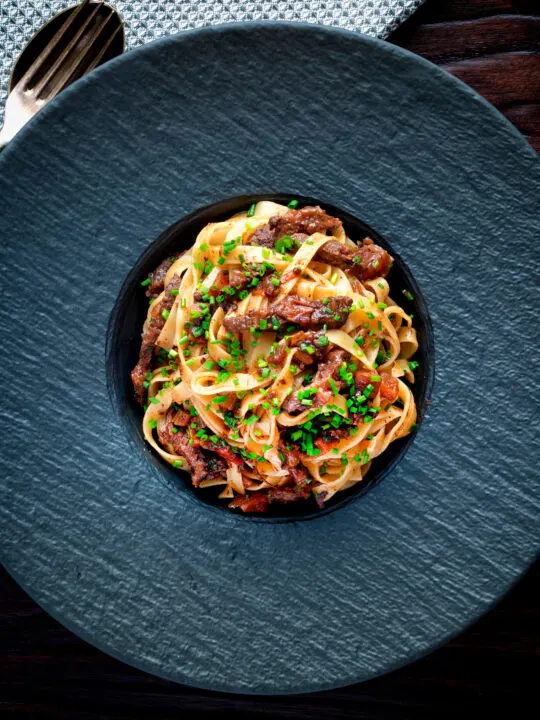
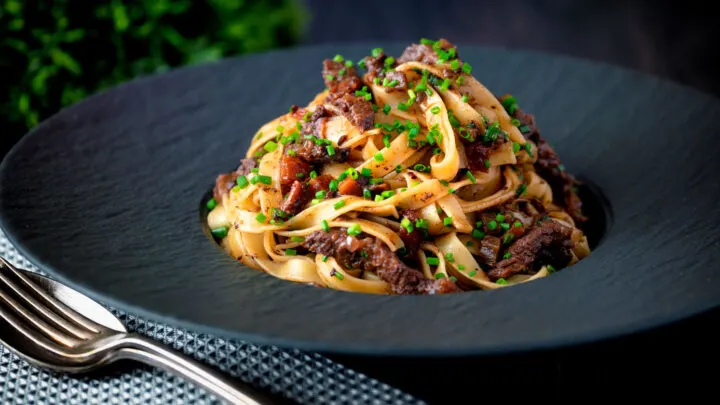
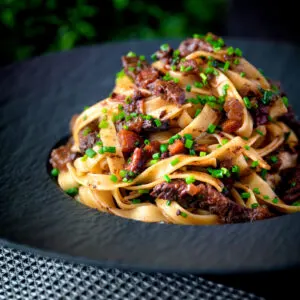
I've served this beef cheek ragu in the pictures, stirred through pappardelle pasta. If I am serving this with pasta, then I stretch it to 6 servings.
Whilst it does make a wonderful pasta sauce, you can do so much with this delicious ragu.
It is essentially a proper bold beefy stew in a red wine sauce, naturally, which means it will work wonderfully with some mashed potato. It's also wonderful with a nice cheesy polenta!
If I am serving it with mash or polenta, then I usually make this recipe serve 4.
But you should definitely not get tunnel-visioned. I've used this beef ragu to make loaded nachos, and filled sandwiches with it, and it makes a stunning pie filling.
You could even top it with mash and turn it into a cottage pie!

Equipment Used
I only mention brands of equipment if I think that they make a material difference to a recipe. But if you have any questions, feel free to ask them in the comments section below the recipe.
- Hob/stovetop.
- Oven.
- 24cm or 10" saucepan with a lid.
- Chopping board.
- Kitchen knife.
- Kitchen tongs.
- Stirring and serving spoons.
- A combination of weighing scales, a measuring jug, measuring cups and spoons.

Beef Cheek Ragu Recipe
Ingredients
- 1 Beef Cheek 600-650g
- 2 tablespoon Cooking Oil
- 1 Medium Onion 150g
- 1 Small-Medium Carrot 75g
- 2 Sticks Celery 100
- 3-4 Rashers Smoked Streaky Bacon 75g
- 6 Sun-Dried Tomatoes ⅓ Cup
- 6 Anchovies
- 1 tablespoon Tomato Puree
- 1 Bottle Red Wine
- 250 ml Beef Stock 1 Cup
- 2 Sprigs Fresh Thyme
- 2 Bay Leaves
Instructions
- Trim the beef cheek of any excess fat and sinew.
- Peel and cut the onion into a 5mm (¼") dice.
- Chop the carrot into a 5mm (¼") dice.
- Cut the celery into a 5mm (¼") dice.
- Slice the bacon into 2-3mm (⅛") thick strips across the bacon.
- Heat the oil in a heavy-based medium-sized (24cm or 10") saucepan that you have a lid for over a high heat.
- When the oil is hot, add the beef and sear on both sides until it has a deep colour (2-4 minutes on each side). Remove the beef and set it aside.
- Reduce the heat to medium, add the tomato puree and anchovies and stir constantly for 1 minute.
- Add the diced onion, carrot, celery and bacon and cook for 10 minutes, stirring every 3-4 minutes or so.
- Turn the heat up as high as it will go, and when the vegetables start to really sizzle, pour in the red wine, add the thyme and bay leaves. Boil the wine hard until it has reduced by about half (10-12 minutes).
- Add the beef stock and sun-dried tomatoes, stir to combine, and then add the beef to the pot.
- Add a lid and transfer to an oven at 160°C or 320°F and cook for 3 hours.
- Remove the pot from the oven, then take out the beef and place it on a chopping board. Slice the beef or ox cheek across the grain and then cut it into strips. Return it to the pot along with any juices from the beef.
- Stir well and return the pot to the oven without a lid for 15-30 minutes to reduce the sauce a little before serving.