


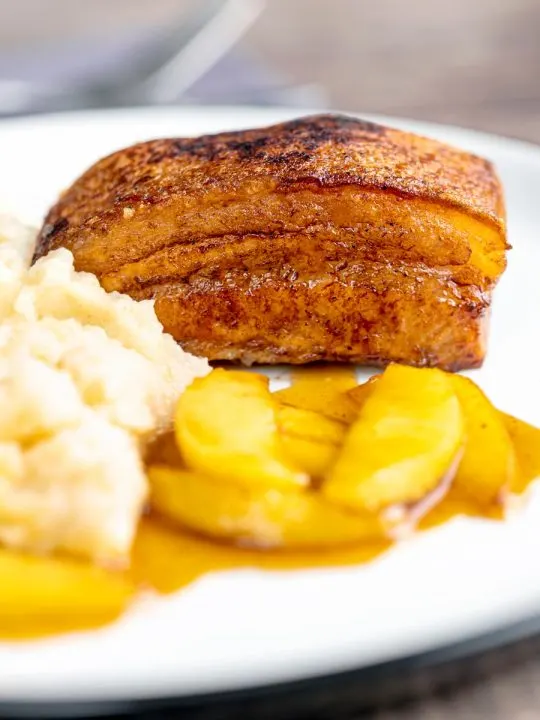
This Instant Pot Pork Belly recipe gets finished in the oven to create a crispy crackling, and it is served with maple syrup cooked apples.
Pressure Cooker Pork Belly
Pressure cookers definitely do some things better than others! This recipe takes advantage of what it does well before using an oven to make up for the things it does less well.
Cooking fattier cuts of pork like belly is definitely one of the things that the Instant Pot does exceptionally well.
I cook ribs in a pressure cooker in the shape of apple glazed ribs and Chinese spare ribs regularly.
I even have a pressed pork belly recipe that gets cooked and then pressed overnight before being finished in the oven.
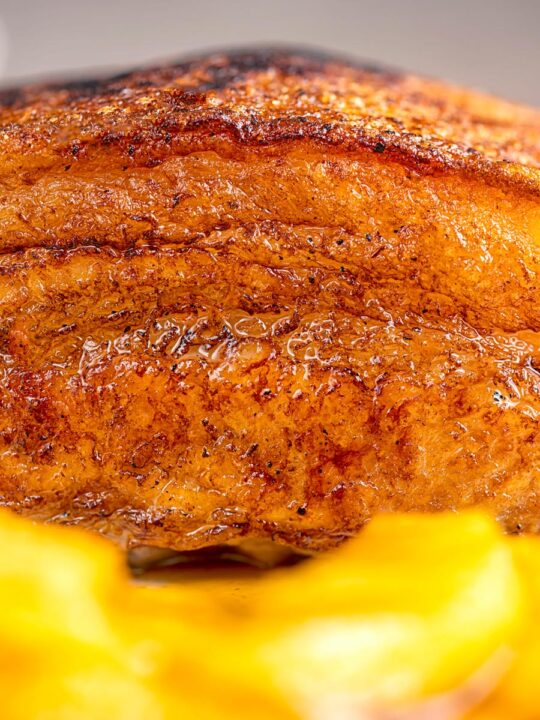
It is essential that you finish this recipe in the oven. Lots of the flavour comes from the second cooking method and, of course, the crispy crackling.
I use a cast-iron skillet, although any heavy-based pan that is oven safe will do.
I start the caramelisation process with the skin side of the pork, but be careful here. It is like toasting nuts... It sits there for ages with no colour and can jump to burnt in the blink of an eye.
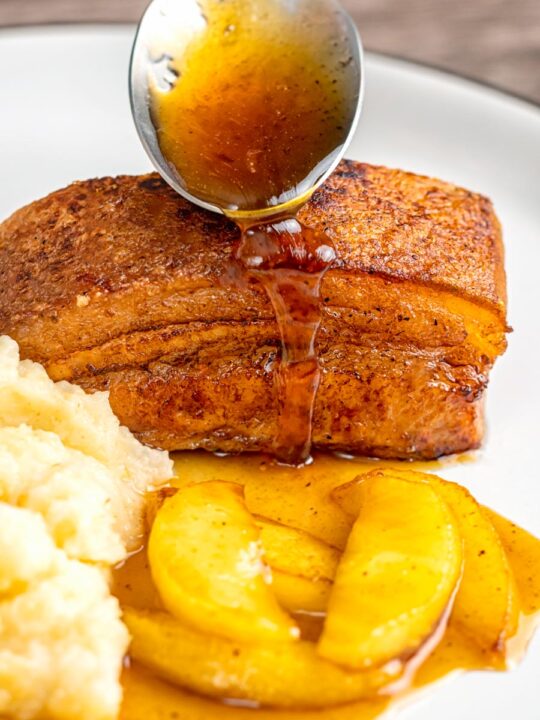
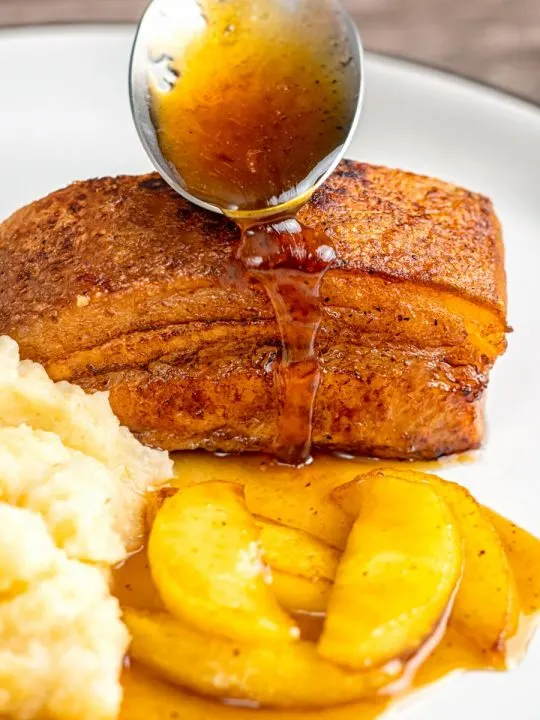
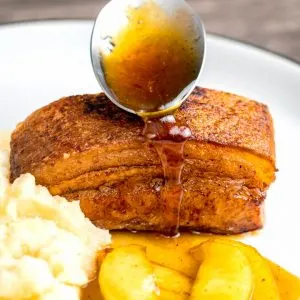
Finally, we reduce some of the cooking juices from the Instant Pot to create a gorgeous sauce to serve with our pork belly. Adding some sharp apples and sweet maple syrup for contrast.

Increasing Portion Size
Like most of my recipes, this one is developed for two people!
But because I am an all-around hero, read greedy, I have tested this recipe for 4, too!
To feed 4, you need to double the size of the pork belly, pretty obvious, huh?
But do not double the liquid in the pot; you only need to increase it by 50%. So 300ml and 375ml of Apple Juice and Chicken Stock, respectively.
In my testing, I found adding 10 minutes to the cooking time in the pot was plenty.
The pork belly should almost "wobble" like jelly when it comes out of the pot.
Do not be tempted to push down on the pork belly when you are caramelising the skin.
When it comes out of the pressure cooker, the fat has very little stability. Pushing down too hard can cause it to delaminate and turn into a porky mess!
Also, do not be tempted to try to dry the skin; your kitchen towel will stick.
As a result, you need to be careful of any liquid content spitting, so do not put too much oil in your skillet.
Serving Suggestions.
Whether it is a classic piece of roast pork belly my sticky pork belly with pineapple or my roast pork belly slices, this is an ingredient that screams COMFORT FOOD at the top of its voice.
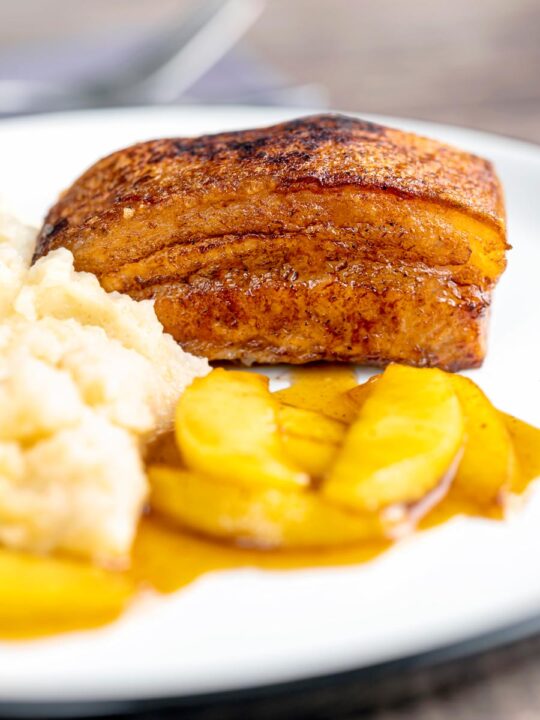
And as far as I am concerned, this Instant Pot Pork Belly is best served with a mash.
My personal favourite is a buttery celeriac mash, although mashed potato is glorious too!
If swede (rutabaga) were not impossible to find here, I would also add a swede and carrot mash into the rotation!
You could also go down the roast dinner route.
Adding roast potatoes or parsnips would be great, but will require some jiggling of cooking time.
Don't forget some greens; this braised cavolo nero kale would be a perfect addition.

Instant Pot Pork Belly Recipe
Ingredients
For the Pork:
- 375 g Pork Belly 13oz
- 1 Large Onions 200g
- 200 ml Apple Juice ¾ Cup + 2 Tbsp
- 250 ml Chicken Stock 1 Cup
- 1 Bay Leaf
- ½ teaspoon Salt
- ⅛ teaspoon Black Pepper
- 1 tablespoon Cooking oil
For the Apples:
- 1 Medium Apple
- 2 tablespoon Maple Syrup
Instructions
- Peel, top and tail the onion and cut into 1cm (just under ½") thick half-moon shapes.
- Arrange the onions on the base of your Instant Pot.
- Pour over the apple juice and chicken stock and add the bay leaf.
- Season the pork belly with salt and pepper.
- Add a trivet and place the pork belly on top.
- Add the lid and cook for 50 minutes at high pressure. Allow a 10-minute natural pressure release.
- Heat your oven to 200°C or 400°F.
- Remove the pork belly from the Instant Pot.
- Heat a heavy-based skillet over a medium high heat.
- Add the pork belly and sear on all sides; this should take 5-10 minutes.
- Transfer to the oven and cook for a further 20 minutes. Remove the pork from the oven and transfer to a trivet, and rest for 10 minutes.
- Core and chop the apple.
- Pour all but a scant covering of fat from the skillet and place it on a medium-high heat. Add the apples and cook for 5 minutes.
- Pour over the maple syrup and add ¼ml (¾ cup) of the pork cooking juices from the Instant Pot.
- Reduce by half and serve alongside the pork.
Emily Williams
Tuesday 10th of January 2023
I assume when you say ‘cook for 50 minutes’ you mean on high pressure?
Brian Jones
Wednesday 11th of January 2023
Hi Emily, yes sorry... I have updated the recipe to reflect this.
Thanks for pointing out my omission.
Brian
Jamison
Sunday 2nd of January 2022
I tried this recipe and the pork belly was just perfect. Skin nice and crispy and the meat tender as anything. Will be using this method from now on! Thanks for sharing :)
Bintu | Recipes From A Pantry
Saturday 2nd of February 2019
That pork looks absolutely delicious and oh wow, that crackling looks perfect! Definitely going to be trying this in my Instant Pot soon!
David @ Cooking Chat
Saturday 2nd of February 2019
This must be loaded with flavor! Restaurant level presentation, too!
Natalie
Saturday 2nd of February 2019
Your photographs look like they came out of a magazine - simply stunning! Looks absolutely delicious ♥